How and When to Use a Circular Polarizer
Today we are talking about how and when to use a circular polarizer for landscape photography, Why it's the only filter I wouldn't be without and more importantly, why you shouldn't always use one.
what is a circular polarizer?
A circular polarizer is made up of 2 bonded polarized glass elements, The frame is made from two rotating metal parts that let the filter rotate while being fixed to the front of a lens. When the polarizer is rotated the polarization effect will increase and decrease.
To quash a myth, the circular polarizer is not called circular because of its shape or because it rotates in a circular motion, it is, in fact, to do with the way that the light is polarized. There are 2 types of polarizers, linear and circular, both are round and rotate. The linear, however, messes around with DSLR metering and focusing systems, therefore, making them useless for us DSLR or mirrorless users. So yeah, get a circular polarizer or CPL as they are sometimes called.
So now we know what a polarizer is, what can we use it for?
A circular polarizer has many uses and affects the image in different ways depending on the direction of light. If you are photographing a sky, for example, rotating the polarizer will intensify the blues and make cloud details pop. I would recommend shooting at 90 degrees to the sun for maximum effect. You can easily gauge this by facing the sun, your left and right shoulders will then face at 90 degrees, this is where polarization will be the most effective. Shooting directly towards the sun will quite often have no impact on saturation or cloud detail at all.
So to recap if you are shooting sky's, expect to see more cloud detail and more saturated blues at 90 degrees to the sun.
Cut through that haze
Another great way to use a polarizer would be to cut through haze within a landscape.
Essentially haze is water vapour. Water vapour reflects light and a polarizer will help to cut down on this reflection as the light is scattered. Again the direction of light is critical for getting the best results. Whenever facing directly into the light your polarizer will struggle. If you are needing to cut through haze, think about composing your shot in such a way that the polarization takes maximum effect. Trial and error is probably the way to go here.
So both of the techniques talked about above have their limitations, but where the polarizer really comes into its own, is for woodland photography and water photography.
Woodland and water
In the woodland quite often we are faced with a lot of glare, this glare comes in the form of light reflecting from shiny leaves, sometimes this can be intensified in wet or damp conditions.
As the light is reflected from the foliage, this white light will stop the camera actually recording the details in those areas, overall it will reduce the quality of the image and make it less saturated but more contrasty. Using a polarizer in the woodland is a great way to cut through this reflection, saturate the colours and give a much more balanced feel to an image.
Reflections
Probably the biggest impact a Circular polarizer can have on an image is when we use it to cut through the reflections on the surface of water. This can be great for seeing details below the surface and give the water a richer more saturated look.
So if the polarizer is such a fantastic tool, wouldn't it be worth just leaving it on the lens for good?
Well not really! All of these techniques are great, but what we really need to think about is whether or not it helps the composition of the photograph we are taking.
Take this shot for example.
Had I used a polarizer here, I would have lost all of these wonderful autumn reflections?
Had I used a polarizer here, maybe that haze would have been reduced and its that separation between the foreground tree and the background trees that makes this shot work. So having a clear idea of the look you are trying to achieve, is critical to getting the best results.
If you are undecided, as is often the case with me, simply take a shot with polarization and one without. That way you have both bases covered.
So now we have covered what a circular polarizer is good for, let's look at a few reasons not to use it at all.
When not to use a circular polarizer
So when photographing sky's we have to be really careful that we don't get uneven colours within the blue areas of the sky itself. This will be accentuated the wider you go with your lens. Once you get below 24mm on a full-frame camera, expect to run into big problems regarding darker patches in your sky.
I would suggest that if you are thinking about using a polarizer to increase saturation or to make clouds pop, would it not be better to do this in post-production.
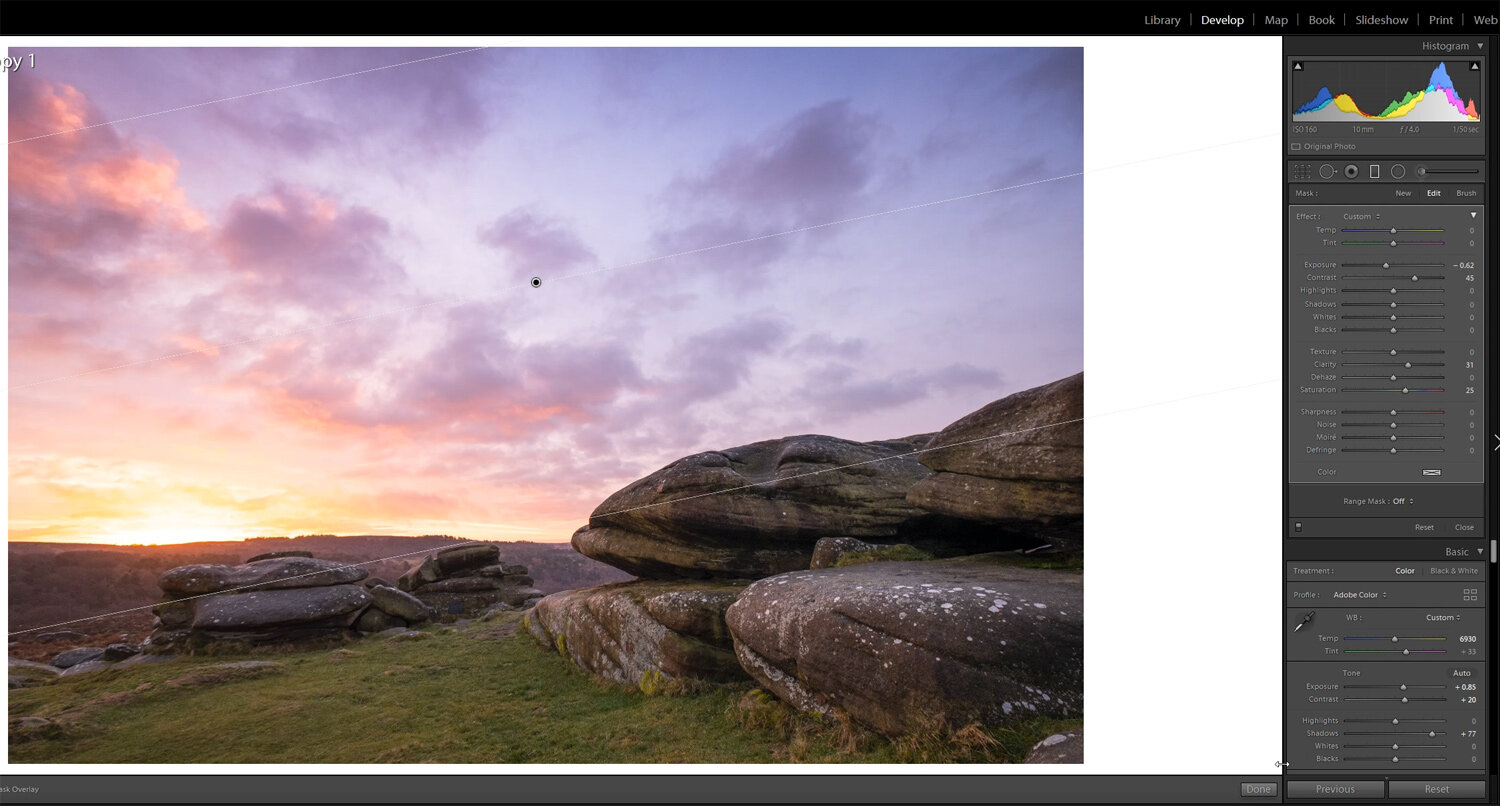
Adding a graduated filter in lightroom with a little saturation and clarity can pretty much achieve the same results with less room for error.
I wouldn't use a polarizer for shooting panoramas. Having darker areas in your image will make Stichting really difficult, so definitely avoid them if you are thinking about a pano.
Again I wouldn't use a polarizer if I am shooting directly into the sun, the effect will be minimal and you are more likely to introduce lens flare and ghosting in the image. Another thing to remember is when using a polarizer we are adding another glass element to the front of the lens. If we are paying many hundreds or thousands of pounds for a lens, the fewer things we put in front of it the better.
I would say, only use a polarizer if it improves the quality or the composition of your image.
Exposure
Using a polarizer will affect your exposure too. A polarizer can reduce the amount of light entering the sensor. The polarizer I use decreases my exposure by around a stop. This may means you will need to bump up your iso if you are shooting handheld or even use a tripod if the light levels are already on the low side.
Probably the biggest thing to consider though - does using a polarizer help your composition. If it doesn't take it off, the less glass the better.
Purchasing a circular polarizer
A few things to look out for when purchasing a polarizer.
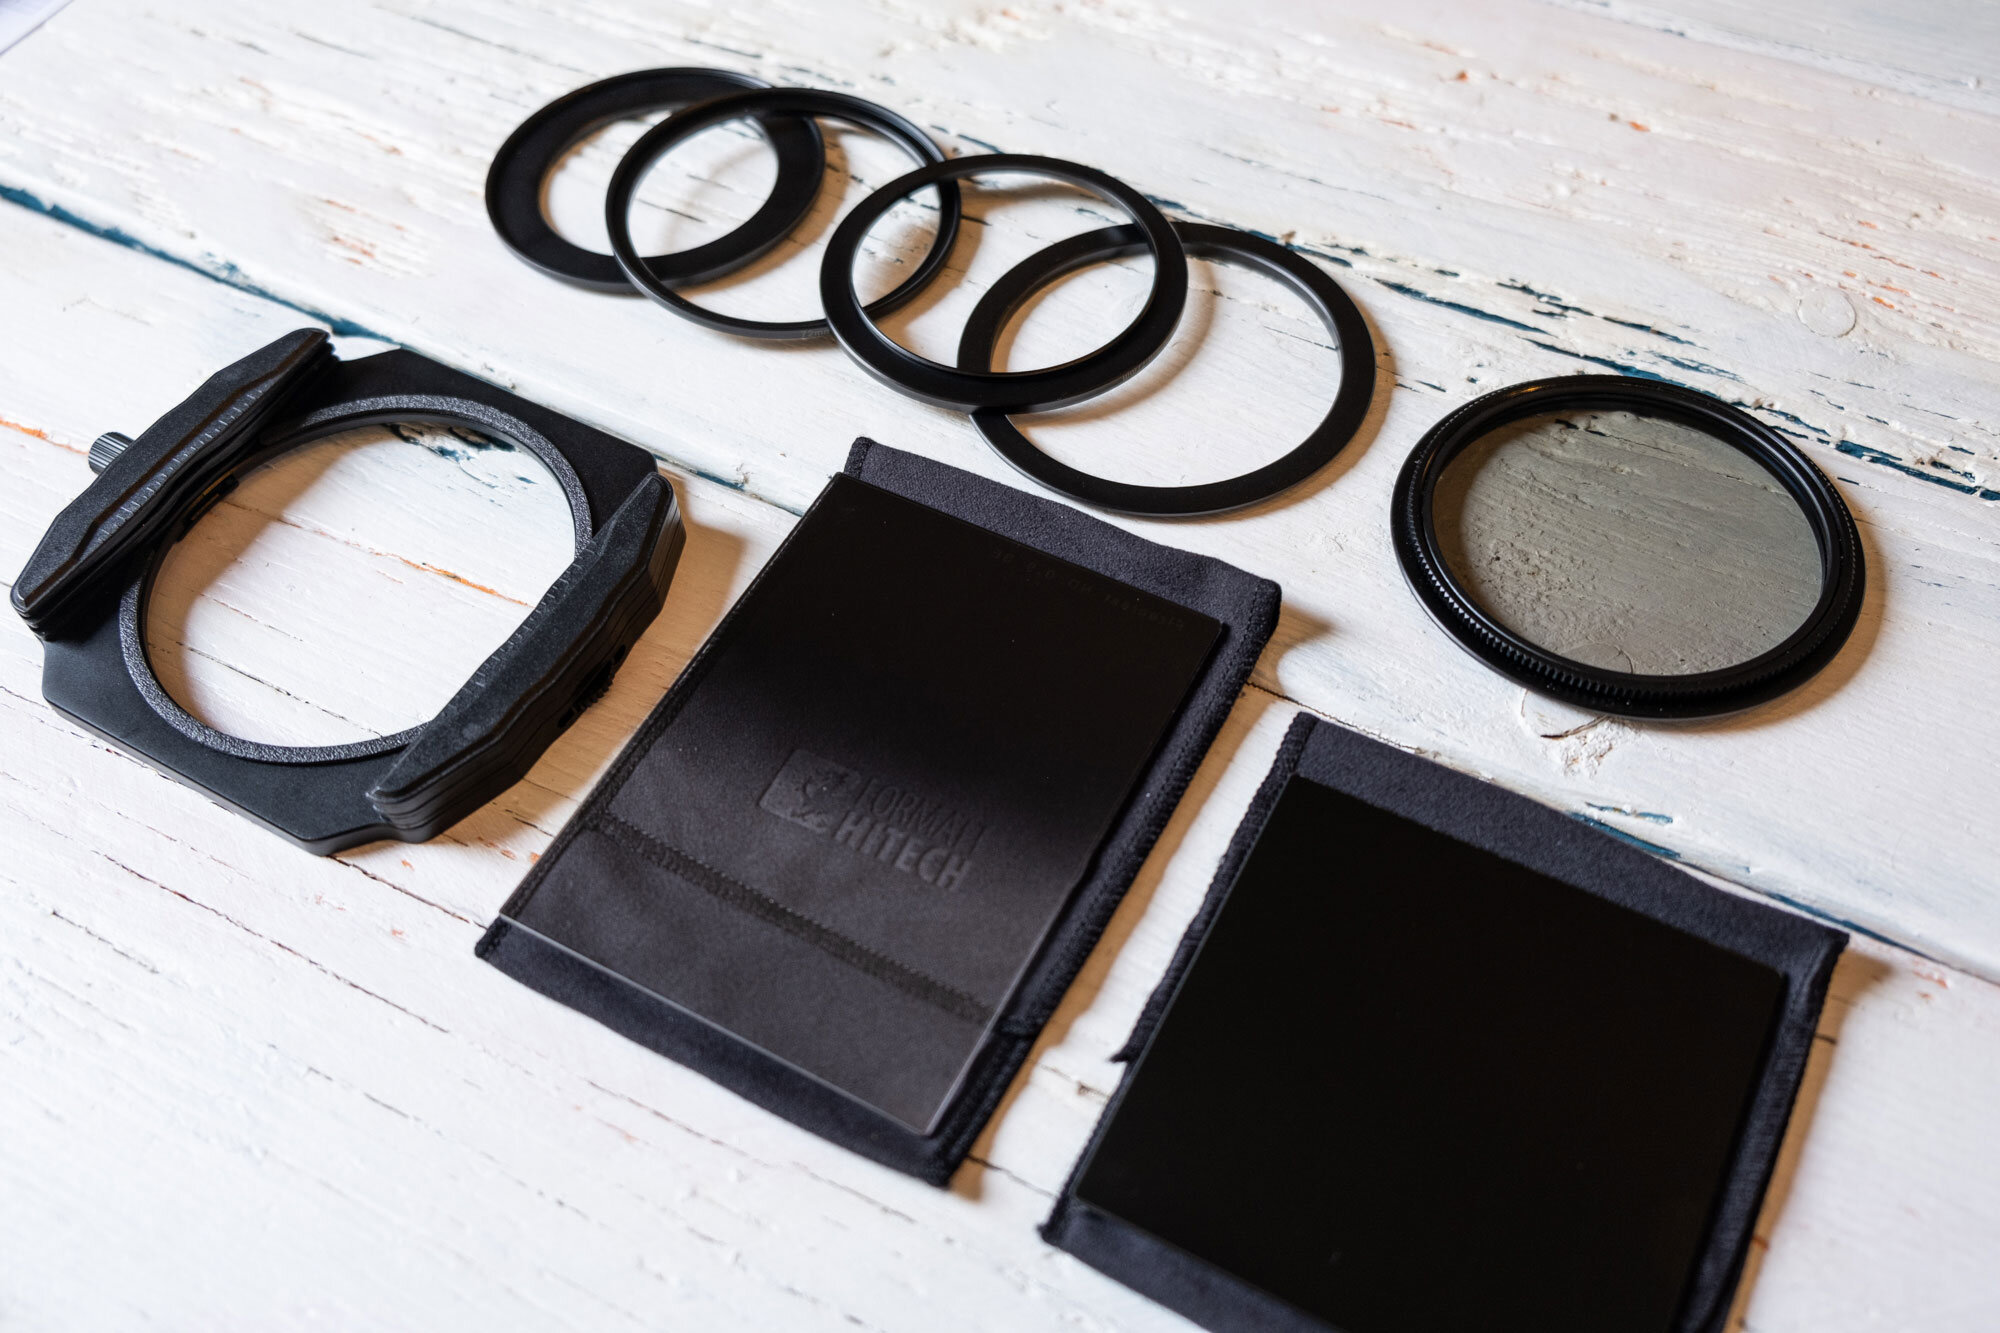
Buy the best you can afford. Buying the best filters you can afford will help in the long run, they will outlast a camera tenfold if you look after them. Buy one for the biggest lens you have or larger if you are planning to get larger lenses in the future. You can then buy step-up rings for your smaller lenses, meaning you only need to buy one filter
Think about whether you are going to use a modular system or a screw-in system. Modular systems such as this will have a built-in polarizer that fits with the set.
If you are going down the screw in route, think about getting some quick release adapters like these Manfrotto ones, they save so much fiddling when you are out in the field.
If you would like to learn more about circular polarizers, please feel free to watch my in depth video below.
